


If you’re anything like me, your brushes are more than just tools, they’re an extension of your hand. Whether you’re using professional-grade sables or a trusty find from the makeup aisle, we all want our favorites to stay "snappy" and soft for as long as possible.
When I first started, I was the queen of the quick rinse. I thought a splash of white spirit (I use oil as medium), was enough, but I soon realized that neglected brushes lead to split ends and ruined paintings. After years of refining my process, I’ve mastered a routine that keeps my brushes in gallery-ready condition.
1. The Pre-Wash: Don’t Skip the Wipe
Before water or solvent ever touches your brush, grab a rag or a piece of kitchen towel. Gently squeeze the bristles from the ferrule (the metal bit) toward the tip to remove the bulk of the paint. The less paint you take to the sink, the less mess you’ll have to deal with.
2. Choosing Your Solvent Wisely
The days of harsh, smelly chemicals are fading. Here is how I match my cleaner to my medium:
• For Oils: While white spirit is the traditional choice, it’s tough on bristles and lungs. I’ve switched to safflower oil or Gamsol for a gentler, odorless experience.
• For Acrylics & Watercolors: Lukewarm water is your best friend. If the acrylic has started to "skin" over, a drop of specialized brush cleaner can work wonders.

3. The Deep Clean (The Game-Changer)
Water alone won’t get the pigment out of the "heel" of the brush (near the metal).
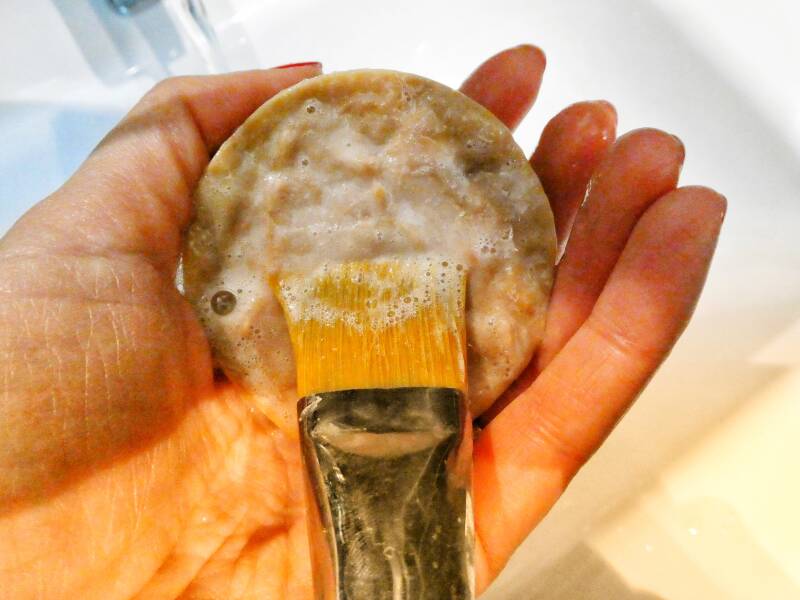
• The Soap: Use a dedicated artist’s brush soap or a mild, pH-neutral dish soap.
• The Technique: Swirl the brush gently in the palm of your hand or on a silicone cleaning mat. These mats have tiny ridges that help massage the paint out of the center of the brush without damaging the fibers. Rinse and repeat until the suds are pure white.
Step 4: Rinse Thoroughly
Rinse the brush under lukewarm water—never too hot! Extreme heat can weaken the glue that holds the bristles together, leading to shedding and distortion.
5. Reshaping and Drying
Once clean, give the bristles a gentle flick to remove excess water and use your fingers to "point" or "flat" the head back into its original shape.
Pro Tip: Never dry your brushes upright in a jar. Water travels down into the ferrule, rots the wood handle, and weakens the glue.
6. The "Gravity" Storage Method
The gold standard for drying is hanging brushes upside down. I use a brush washer with a spring coil holder. It suspends the brushes so the bristles don’t touch anything and gravity pulls moisture away from the handle. If you don't have one, laying them flat on a clean towel with the heads hanging over the edge of the table is the next best thing.

Final Thoughts
A little bit of discipline at the end of a painting session saves you a lot of money at the art store later. Your brushes take care of your vision, so take a few minutes to take care of them!
Do you have a "secret ingredient" in your cleaning kit? Or perhaps a favorite eco-friendly solvent? Let’s chat in the comments!
Add comment
Comments